Setting Up Custom Domains in Azure Static Web Apps
Configuring a custom domain for your Azure Static Web App is straightforward. Follow these simple steps to get your website running on your own domain.
Step 1: Open the Custom Domains Page
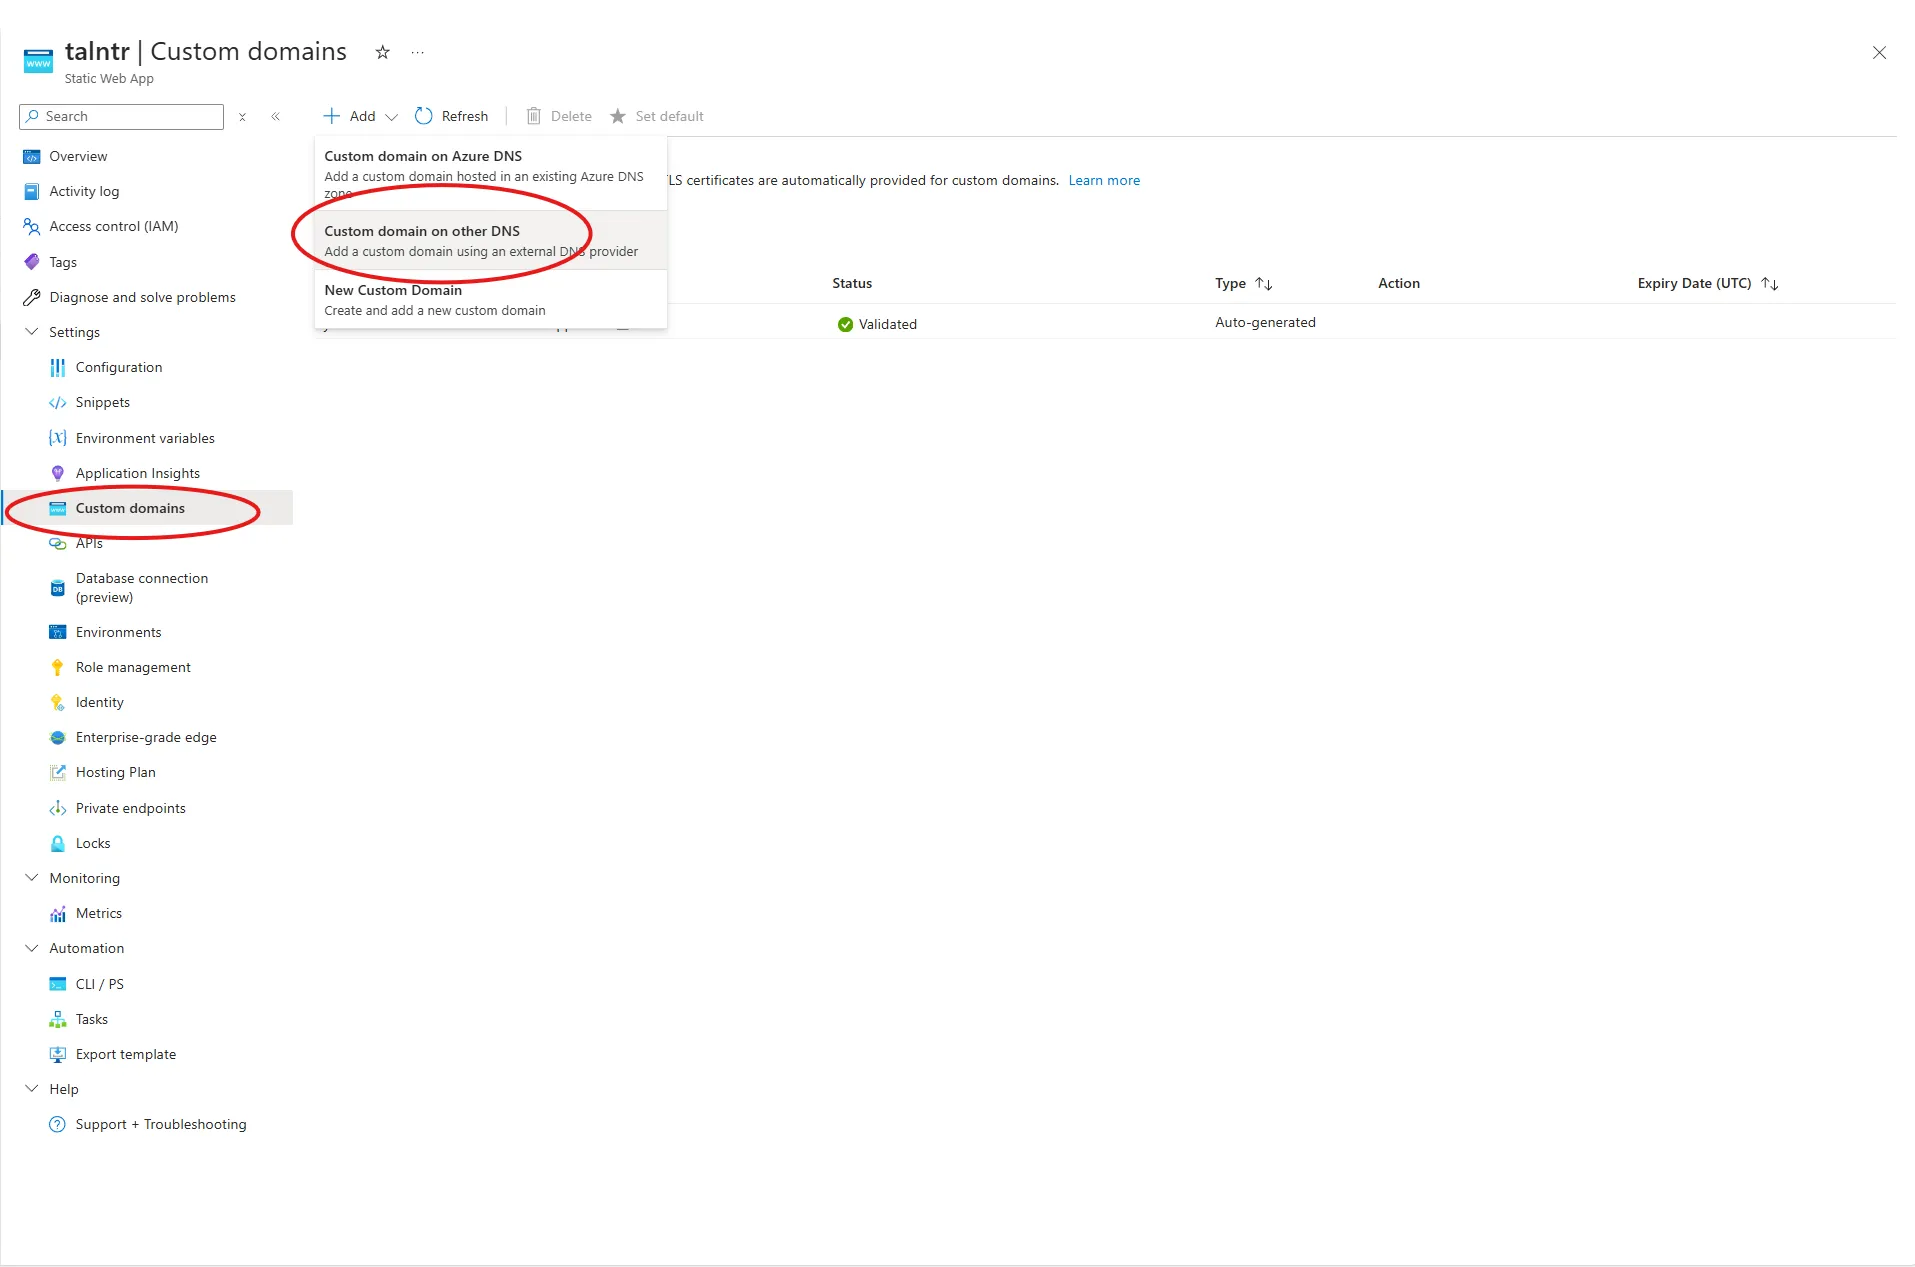
Go to your Azure Static Web App in the Azure Portal. From the left-hand menu, click on Custom domains.
Step 2: Add a Custom Domain
Click the Add button and choose the option for Custom domain on other DNS.
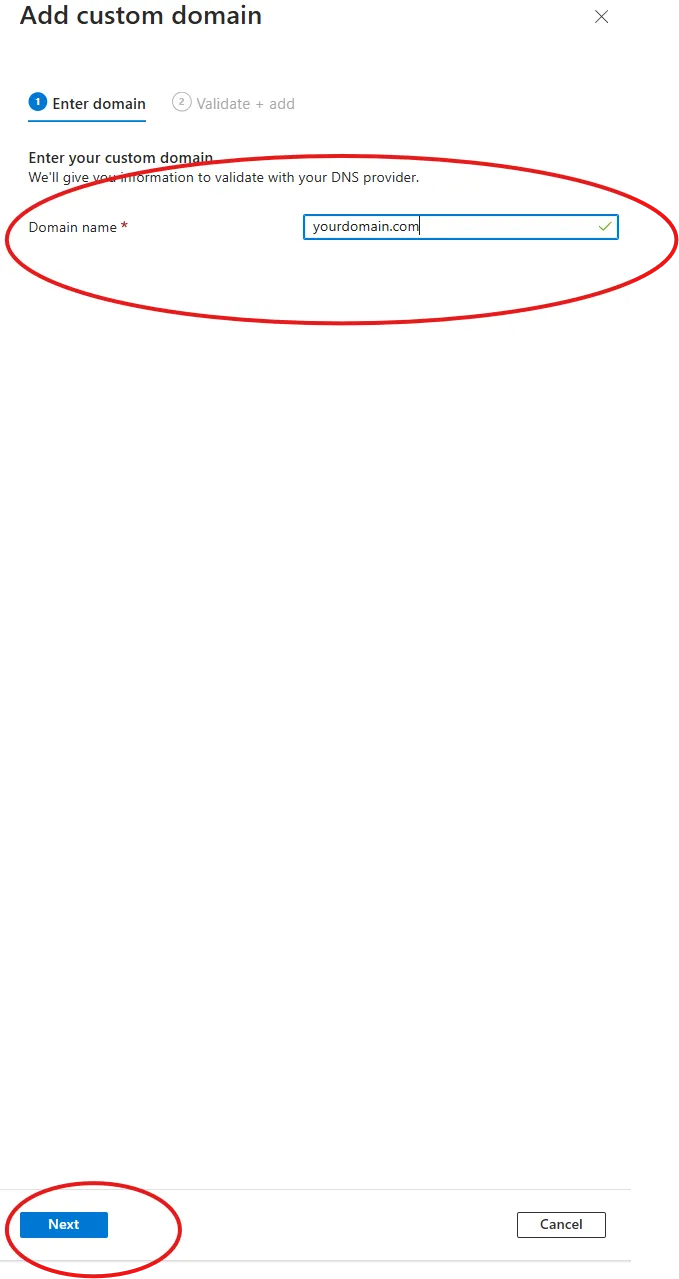
Step 3: Verify Your Domain
To verify your domain, you need to add a TXT record to your DNS provider.
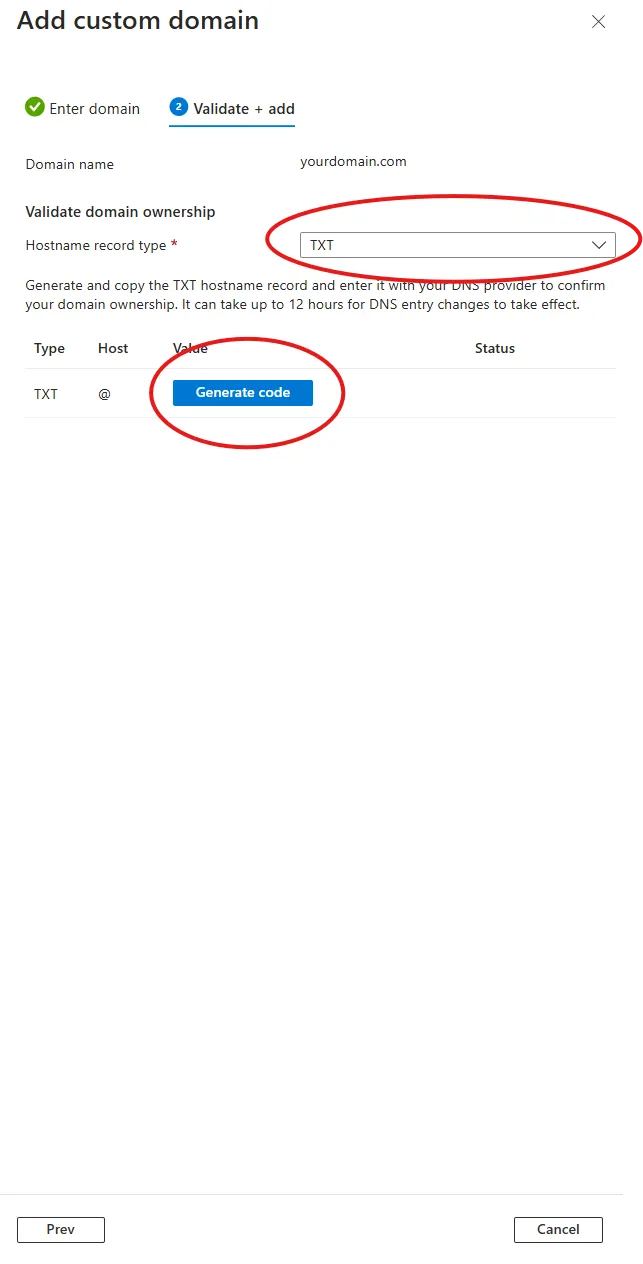
Copy the generated TXT record value and paste it into your DNS provider’s settings. This unique value provides a valid connection between Azure and your DNS provider.
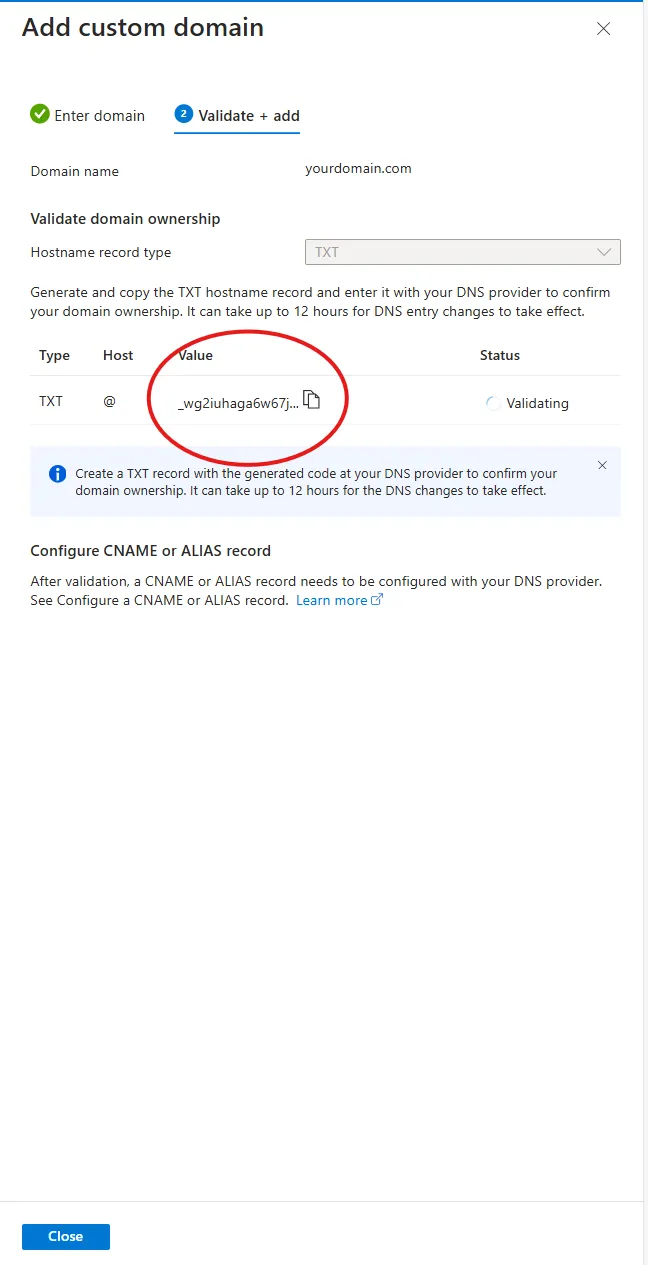
For example, if you use Hostinger, it might look like this:

Step 4: Add a WWW Subdomain
Repeat the process, but this time use www.yourdomain.com instead of yourdomain.com.
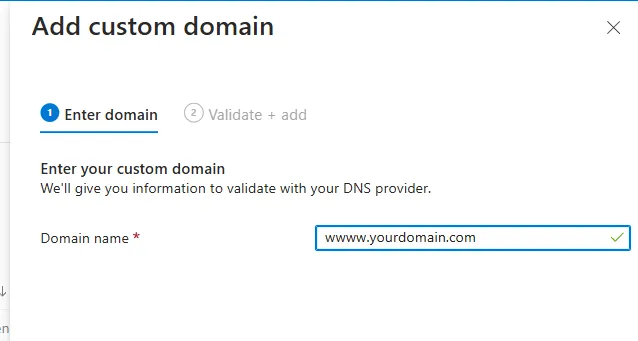
Step 5: Configure CNAME Records
In the Azure portal, select CNAME and click the Add button at the bottom of the screen.
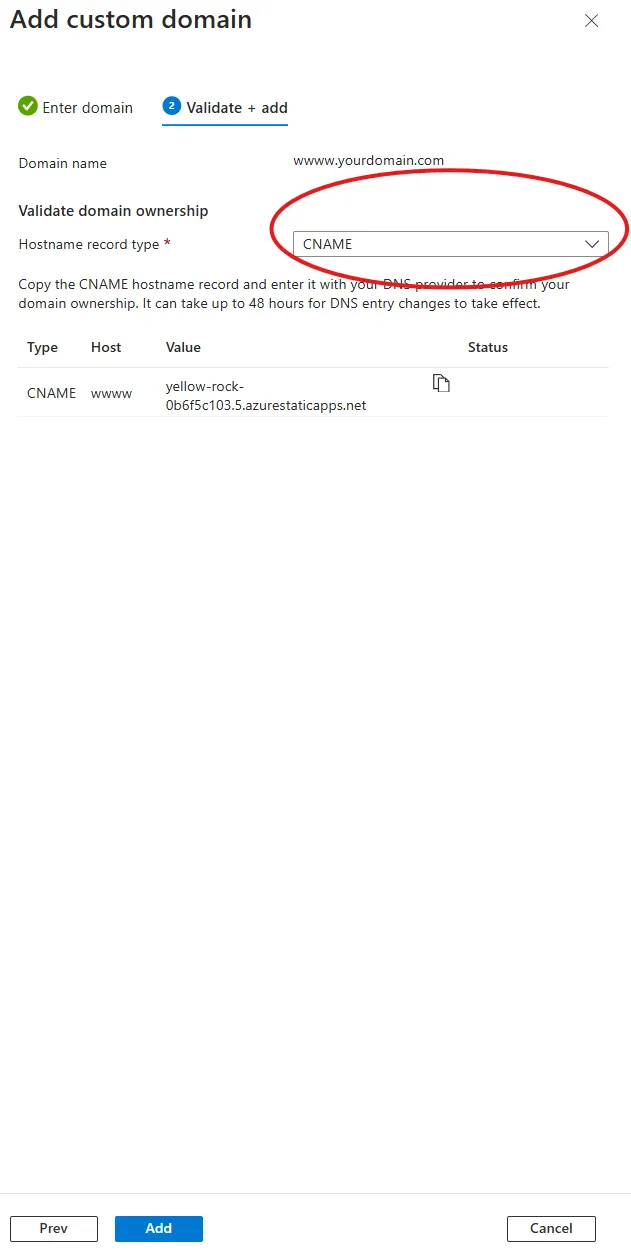
In your DNS provider’s settings, add or edit the following CNAME records:
-
For www.yourdomain.com:
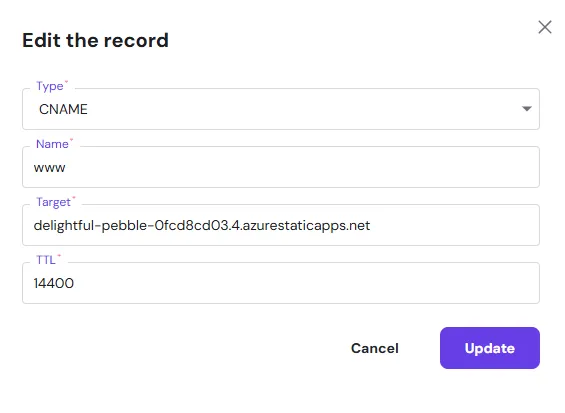
-
For the root domain (yourdomain.com), add an alias (CNAME):
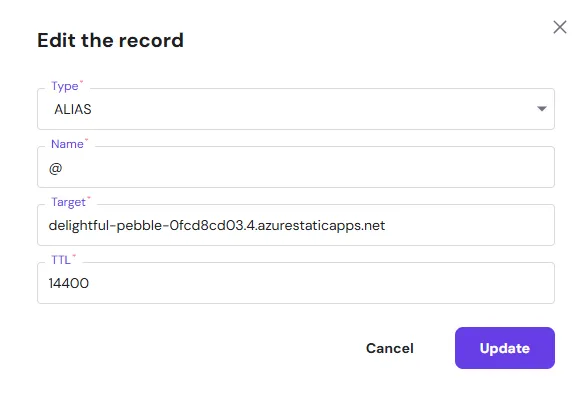
These configurations make sure your website works with both www and without it.
Done!
That’s it! Your custom domain is now linked to your Azure Static Web App. Enjoy!